
A kitchen is often the centerpiece of a home, making it one of the most common spaces chosen for improvement. Whether the goal is to enhance daily functionality, improve storage, or achieve a new design vision, planning a complete kitchen overhaul provides the framework for success. Without a structured approach, projects can quickly exceed budgets or extend far beyond timelines. By following a step-by-step process, homeowners can move confidently through each phase, from budgeting and layout to finishes and installation. Careful preparation also ensures that design choices align with long-term lifestyle needs, whether that means accommodating large family gatherings, creating efficient work zones for cooking, or adding features that increase property value. A detailed plan transforms the remodel from a stressful undertaking into a rewarding investment that improves both daily living and overall home appeal.
Every successful kitchen overhaul begins with a clear financial plan. Budgets should reflect not only materials and labor but also allowances for unexpected expenses. Industry experts recommend allocating 10–15 percent of the total budget to cover contingencies, such as unforeseen electrical or plumbing issues.
Another key consideration is balancing high-impact items with cost-effective alternatives. Cabinetry, countertops, and appliances often consume a significant portion of expenses, so identifying where to invest and where to save is essential. For example, choosing quartz over natural stone may reduce costs while still providing durability and style. A well-thought-out budget ensures the remodel remains both financially achievable and aligned with design goals.

A complete overhaul should always begin with clear objectives. Some homeowners prioritize storage, while others focus on maximizing natural light or adding professional-grade appliances. Listing goals early helps guide all future decisions.
When multiple family members use the kitchen, their input can influence the outcome. For example, avid cooks may want double ovens or large prep areas, while families with children may prefer open shelving and easy-to-clean surfaces. By identifying what matters most, the project remains centered on improving daily life rather than simply chasing trends.
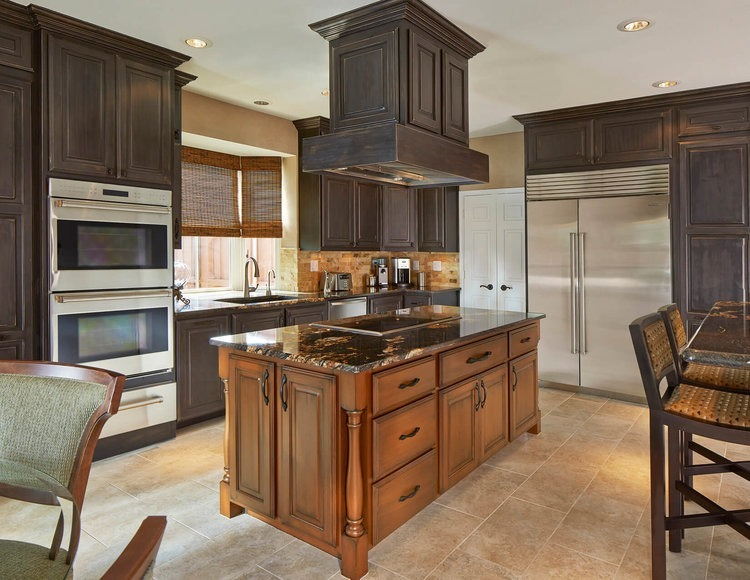
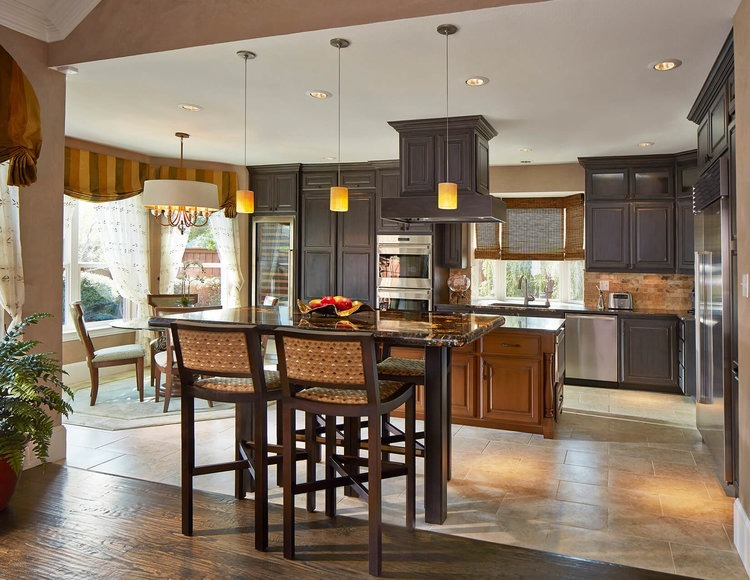
The layout forms the backbone of a kitchen remodel. Traditional options include the L-shape, U-shape, and galley designs, each offering different advantages depending on space and workflow. The work triangle—connecting the sink, refrigerator, and stove—remains a trusted guideline, ensuring efficiency during food preparation.
Modern layouts also consider open-concept living, allowing the kitchen to flow into dining or living spaces. Adding an island with seating creates a multifunctional hub for cooking, working, and entertaining. Careful planning of circulation space prevents overcrowding, ensuring the remodel enhances usability as much as aesthetics.
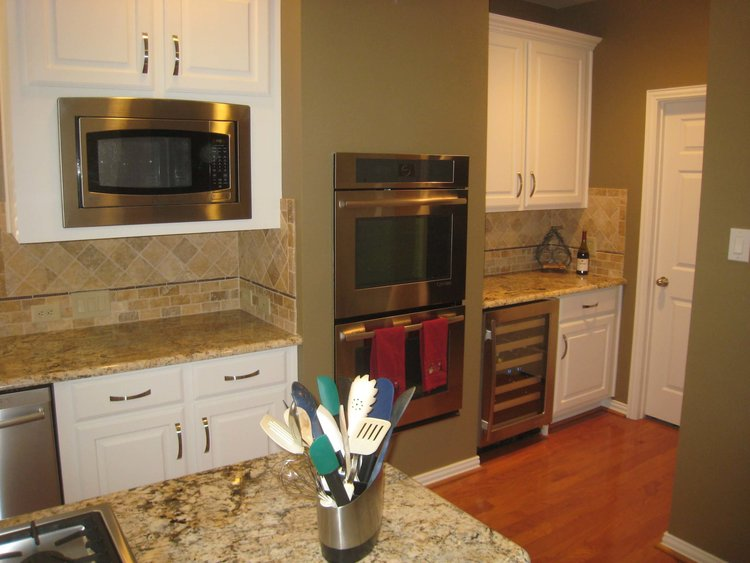
Appliances often define how a kitchen functions long-term. Energy-efficient models not only reduce utility bills but also align with sustainable practices. Homeowners should also consider appliance placement. For instance, positioning a microwave at counter height may improve accessibility, while built-in wall ovens save floor space.
Fixtures, such as faucets and sinks, deserve equal attention. Undermount sinks paired with pull-down faucets streamline cleaning tasks, while farmhouse sinks lend character. Choosing finishes like stainless steel, matte black, or brushed brass ties appliances and fixtures together for a cohesive look.
Cabinetry is one of the most visible aspects of a remodel, and choices extend far beyond color or style. Full-overlay cabinets offer a sleek appearance, while inset cabinetry reflects traditional craftsmanship. Beyond aesthetics, storage innovations maximize functionality. Pull-out pantry shelves, soft-close drawers, and hidden trash compartments help maintain organization.
Upper cabinets can extend to the ceiling to eliminate dust-collecting gaps, while open shelving provides easy access to frequently used items. The right storage decisions transform kitchens into both stylish and practical spaces.
Surfaces define much of a kitchen’s character. Quartz countertops remain a popular choice due to their durability and low maintenance, while butcher block provides warmth and natural appeal. Homeowners who prefer luxury may consider granite or marble, though both require ongoing care.
Flooring must balance durability and design. Tile, engineered hardwood, and luxury vinyl plank are all resilient options that withstand heavy traffic. Backsplashes serve as both functional barriers and design statements. Subway tile offers timeless appeal, while patterned tiles introduce personality and color. When chosen carefully, surfaces create cohesion between cabinetry, appliances, and lighting.
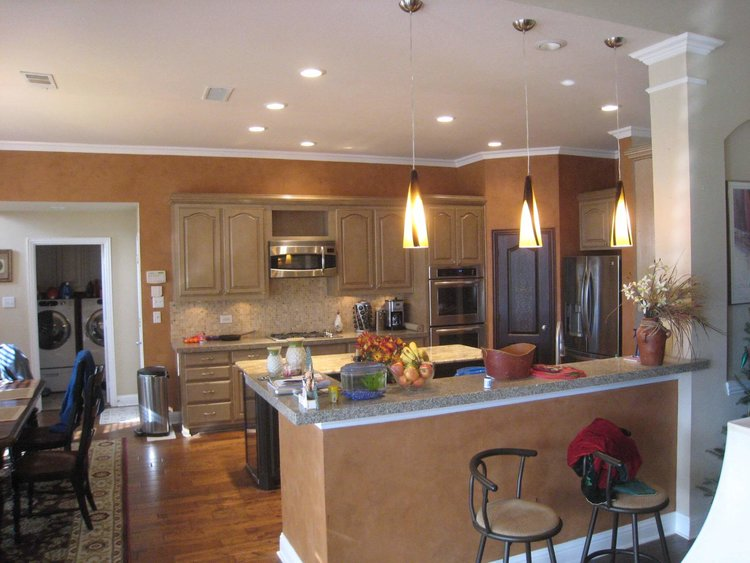
Lighting is often underestimated but plays a vital role in a remodel. A combination of task, ambient, and accent lighting ensures a kitchen feels both functional and inviting. Recessed ceiling lights illuminate work zones, pendant fixtures add style above islands, and under-cabinet lighting brightens countertops.
Electrical updates are equally important. Adding outlets with USB ports supports modern device use, while dedicated circuits for high-power appliances prevent overload. Planning these details early prevents costly adjustments during installation.
While aesthetics drive many remodel decisions, comfort should not be overlooked. Heated flooring, smart appliances, and integrated sound systems enhance daily use. Touchless faucets and voice-controlled lighting add convenience while supporting hygienic practices. These updates demonstrate that style and comfort can work hand in hand.
For those considering larger home improvements, remodeling often goes hand-in-hand with other projects. Homeowners who are already working with home remodeling specialists, for example, may integrate kitchen upgrades with additional improvements across the property. This approach ensures consistent design throughout the home.
Even the most detailed plan requires skilled execution. Homeowners should evaluate contractors by reviewing references, portfolios, and licenses. Written contracts outlining costs, materials, and timelines protect both parties and help keep expectations clear.
Collaboration between professionals also matters. Designers, contractors, and electricians must coordinate seamlessly to prevent delays. Choosing professionals who communicate clearly and respect the homeowner’s goals results in smoother execution and a higher-quality finish.
Remodeling can disrupt daily routines, making preparation vital. Temporary kitchen setups with portable appliances or designated dining areas help families adapt during construction. Protecting adjacent rooms with dust barriers and floor coverings reduces cleanup.
Clear communication with contractors about working hours, noise levels, and access to the property minimizes stress. By anticipating challenges in advance, homeowners maintain better control over the process.
During construction, consistent oversight ensures work progresses as planned. Homeowners or project managers should regularly review milestones, ensuring cabinetry aligns properly, electrical systems are up to code, and finishes match approved samples. Addressing concerns immediately prevents small issues from becoming significant setbacks.
Flexibility is also important. While planning sets the foundation, unexpected conditions may require adjustments. Remaining solution-oriented ensures the project continues moving forward without unnecessary conflict.
The last stage of a kitchen overhaul involves details that bring the entire design together. Hardware, such as handles and pulls, provides character, while carefully chosen paint colors tie cabinetry and walls into one cohesive space. Adding décor, like stools or statement lighting, personalizes the kitchen further.
Final inspections confirm that plumbing, electrical, and structural work meet code requirements. Once approved, the kitchen is ready for daily use—functioning as both a practical workspace and a design centerpiece.
A complete kitchen remodel can feel overwhelming, but with structured planning and careful execution, it becomes an exciting opportunity to create a space that blends functionality with style. From budgeting and layout design to finishes and final touches, every decision contributes to a kitchen that reflects the homeowner’s lifestyle while adding long-term value.
For those considering additional home improvements alongside a remodel, trusted professionals often extend their services beyond kitchens, providing expertise in interior home renovation, kitchen remodeling, and residential bathroom remodeling in Plano, TX. With the right team in place, a project can move smoothly from planning to completion.
For homeowners ready to turn their vision into reality, The Viking Craftsman delivers the expertise and attention to detail needed for exceptional results. Contact us today.